
slider slaughter
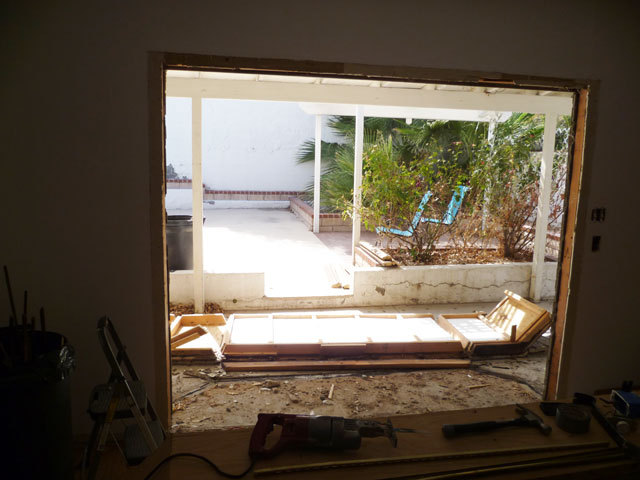
Hope ya like pictures, because I've got a whole lot of 'em today. A couple weeks back I ordered new sliding glass doors for the side and back of the house. There's already one on the side, but it's a mess in every way- any sort of "track" it might've had is gone, so it's a total pain to open and close. And it's brown with ugly un-removable faux tudor mansion grid pattern. Meanwhile, the family room had a large (eight-foot wide) ugly bay window. It was not only ugly, but its presence meant that to get to the pool, you had to use the slider on the side of the house and walk around. That doesn't scream pool party.
Though brown or white vinyl frames are the norm these days, I of course opted for silver aluminum (which is slightly worse for thermal transmission, btw), and they're double-paned low-e glass, so that's all good for blocking heat. This is mostly an issue for the side of the house, because the awning plus elevated wall/rear neighbor block direct sunlight in back. Anyway, they're both getting installed tomorrow, which meant 1) we had to 100% demo the bay window, and 2) I had to remove the perimeter of stucco around the existing side slider because there's a mounting lip back there. Let us begin with Saturday, whence John and I whacked out the bay window (aka "the nook")...
Here's "before". Note the lovely wicker doors... and who doesn't love wicker? (I doesn't, that's who)
Heeeere's Johnny. By now we had most of the trim pieces removed, and most importantly we finally figured out how to get the glass out without having to break it. There were quarter-round trim pieces wedging them in place along with caulk; we eventually figured out how to remove the quarter rounds and push the glass out with minimal breakage.
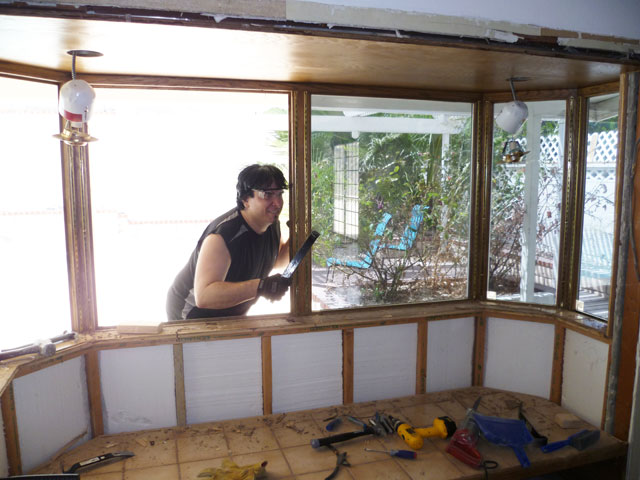
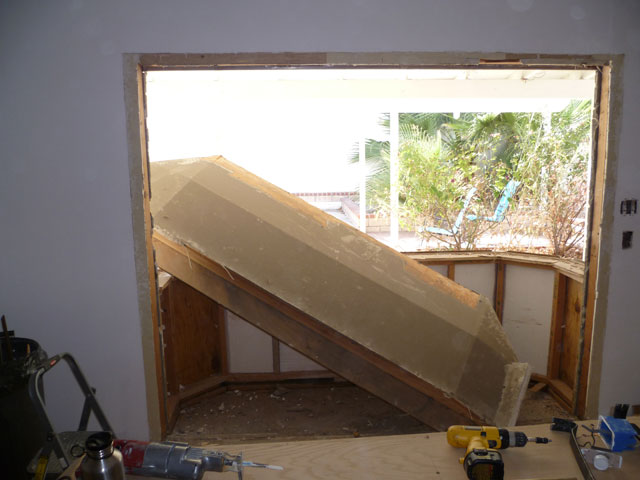
John on step stool trying to figure out how to get the "roof" off. It had a top piece that was rather massively built with 2x4's, plywood and a fiberglass top piece. We never really took it apart- we just removed all the supports and let it fall. It's still sitting on my patio relatively intact. In the foreground of this shot is the "platform" turned on it's side. Once we detached it, we lifted it up and pushed it forward (the tiles are actually the surface that you would sit on, or Kim would sleep on with cushions, depending on the occasion... she is not pleased that we killed the nook).
About that "roof" I was just talking about... like I said, we just kinda knocked out all the supports and made sure we had a lot of room to jump the hell out of the way when it fell. This is also a good time to relocate hammers, pry bars, saws and anything you don't want to land on.
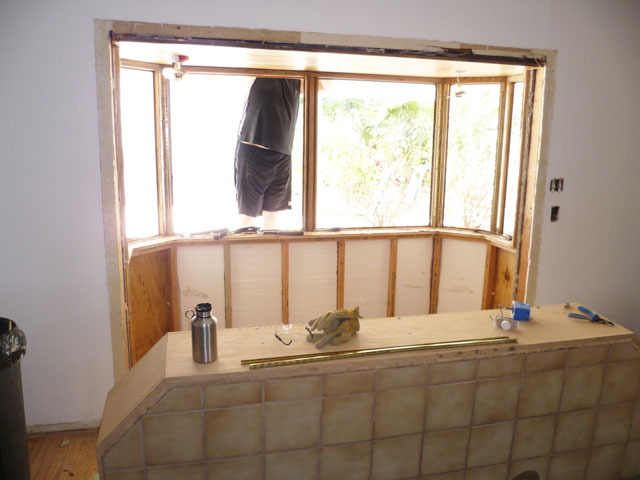
With the top and windows out, we noticed that the waist-height wall would've made a nice outdoor bar by the pool. This awesome idea lasted approximately two minutes...
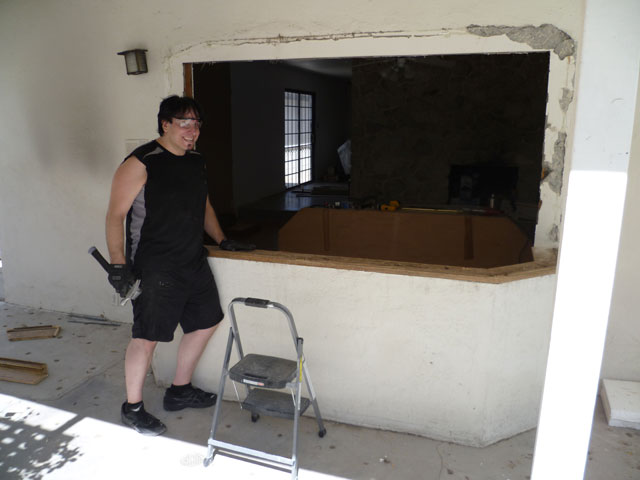
... 'til we knocked that down too. Which was actually pretty easy. But most of it is intact in my yard, so I'm going to have to get it all apart and get rid of it. Much of it is screwed AND glued together which should make getting it apart hell on wheels.
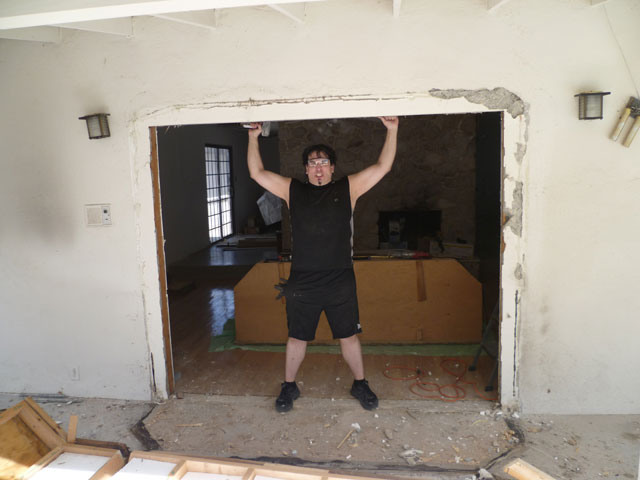
Don't hate John because he's beautiful. Here the whole thing is knocked out.
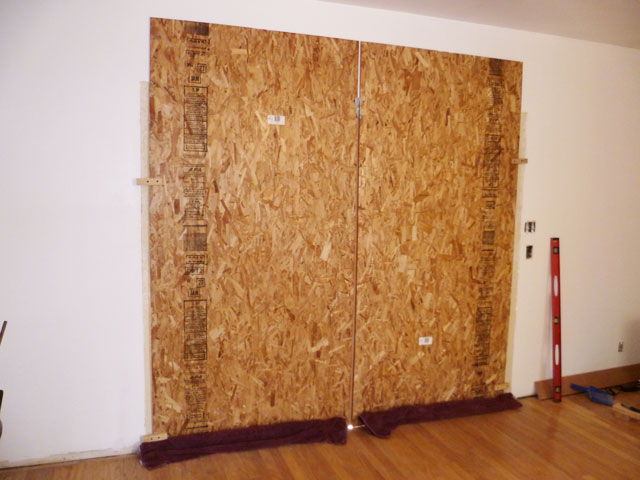
With that done, we screwed a couple of sheets of 5/8" OSB to block the opening until the door gets installed. The 4x8 panels barely made it so I had use some scrap wood to extend to the 2x4 frame to attach them. Other than having a pretty strong dank smell for the first couple of days, this worked fine.
Here's a special bonus. A couple of weeks back I had the exterminator out, so I've had every kind of insect (mostly cockroaches) making their way out to the perimeter of the house to die. This is the second of what I believe is some kind of mutant beetle from hell, with a dime to show the terrifying scale. This thing was roughly the size of a VW Beetle or at least two of The Beatles. I had to bury it in a pine box.

Moving right along to today (Wednesday)... as mentioned, since the doors are both being installed tomorrow, I had to remove the perimeter of stucco around the existing side slider due to mounting lip which is behind the stucco. Apparently they install sliding glass doors (and probably windows) prior to applying stucco. Learn something new every day. So here's what it looked like before:
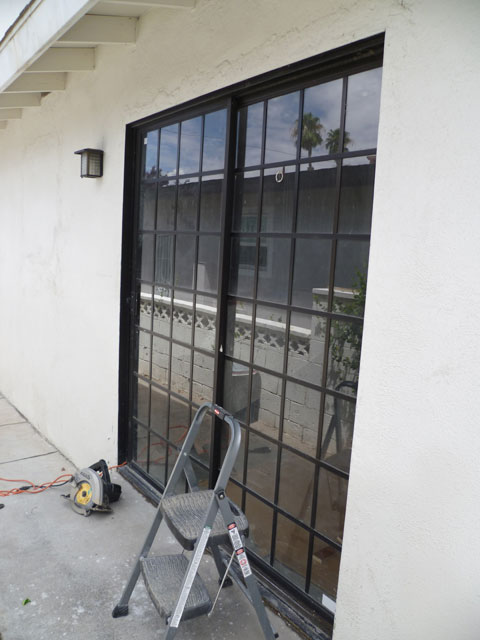
The guy kinda gave me bad advice, because he said I'd need to take off about six inches of stucco, when in reality I only needed a couple. I already had a masonry blade for my 7 1/4" circular saw, so I started cutting a little at the bottom before I realized. I tried a couple different approaches with a big flat metal chisel, hammers, etc. 'til I figured out the best way was to set the saw to cut at a 45° angle a couple inches out. I did this because I was advised that stucco guys don't like a straight line when patching- the angle will make it easier for them to feather in the patch. These cuts were a HUGE pain in the ass to make because you're holding a relatively heavy saw at goofy angles, and it's hard to pull the "trigger" switch, especially because there's a safety button on the back that you're supposed to hit at the same time to make the trigger switch work. This is easy when the saw used at a normal horizontal height/angle, but really hard when you're practically holding it over your head wearing gloves. And once it's going, cutting stucco makes a hellacious storm of flying pebbles and general dust. Though I had heavy gloves and eye protection (an absolute must), I didn't have a breather mask, so I essentially held my breath. There's still crap in my hair, I think.
Anyway, once I had the cuts done, I jammed a big pry bar in there and whacked at it with hammer, and it wasn't too hard to get the chunks of stucco to pop out. I also grabbed my fancy ear plugs for this, because the pry bar makes a pretty painful "ping" every time you hammer it.
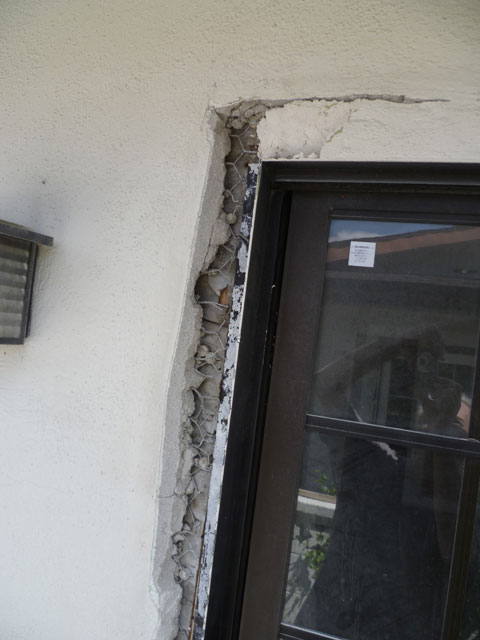
This is of course made a big mess of stucco chunks, but I dutifully swept up the whole thing when I was done. The little porch there hasn't been this clean since I moved in!

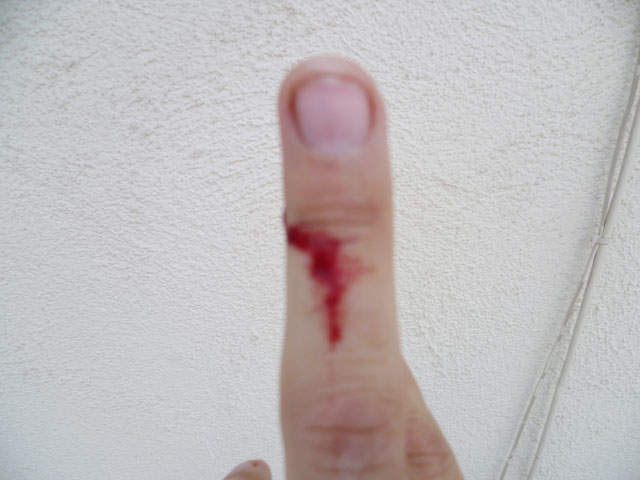
And oh yeah, another fun injury. Did I do this using big mean power tools, hammers and chisels? Of course not. Not even sure what it was, but I managed to cut my finger pouring trash from one garbage can to another, which apparently had a piece of wood with something sharp and metal. Tetanus time, right? (don't worry, I Neosporined and band-aided it). It looks way worse in the pic, it was actually only a hairline cut. Anyway, tomorrow I'll report back with the door install(s).
 Share Article
Reader Comments (4)
Thanks for sharing such an informative post. Please keep it up the great work and surely come back for more information. Please visit us here as well to learn more about swing doors.
javaken e3d3fd1842 https://moniispace.com/nonmyphawitt
javaken e3d3fd1842 https://moniispace.com/nonmyphawitt
javaken e3d3fd1842 https://moniispace.com/nonmyphawitt